There are two main areas of accounting integration. Once you've connected Easy Insight to your inventory management data and to your accounting data, you can connect the two together. First, you can link your sales invoices, purchase invoices, and journals from your inventory management system with the matching invoices and journals in your accounting system.
From your inventory management data source, go to the 'Inventory' section of the data source screen and choose 'Setup Guide':
Click into the 'Finances' section on the setup guide:
For linking invoices and journals, click on the 'Link Invoices and Journals' link to create the linkage between your inventory and accounting invoices and journals. Depending on your particular inventory system and accounting system, this may have already been done automatically.
Once you have the sources linked, you'll have new fields available in your inventory connection and you'll have automated validation reports. There are three folders, each of which maps to a report based on your accounting connection:
If you want to pull over more information from the accounting system, go to the matching report under your accounting system connection:
Add the fields you want into this report and they'll pull through into the inventory reports. For example, you could add Invoice Due Date:
Upon returning to a report in the inventory management connection, you'll see Invoice Due Date as an available field:
There are also a set of validation reports designed to help you quickly compare values between inventory and accounting:
A report labeled as 'Accounting Sales Report Validation' is automatically created to help with validating that sales invoices match between your inventory system and your accounting system.
The COGS from your inventory invoices are also linked with journal entries in your accounting system to help with validating your COGS between the two systems, and a report titled 'Accounting COGS Validation' is created to help make sure that COGS values match between the two systems.
A third report is set up to compare stock adjustments from your inventory system with the journal entries in the accounting system. This report is titled as 'Accounting Stock Adjustment Validation'.
Next, you can choose to allocate variable expenses back to orders to help calculate contribution margin. From your inventory data source, click on the Inventory tab, then go to Allocate Accounting Costs:
From this screen, you can pull data from the profit and loss statement of your QuickBooks Online or Xero data. You'll see the different accounts with profit and loss values:
You can assign accounts as variable or fixed expenses. Only variable expenses are included in contribution margin.
You can also choose to only assign a particular account to a filtered set of orders. For example, you could assign fulfillment costs to only non-FBA orders.
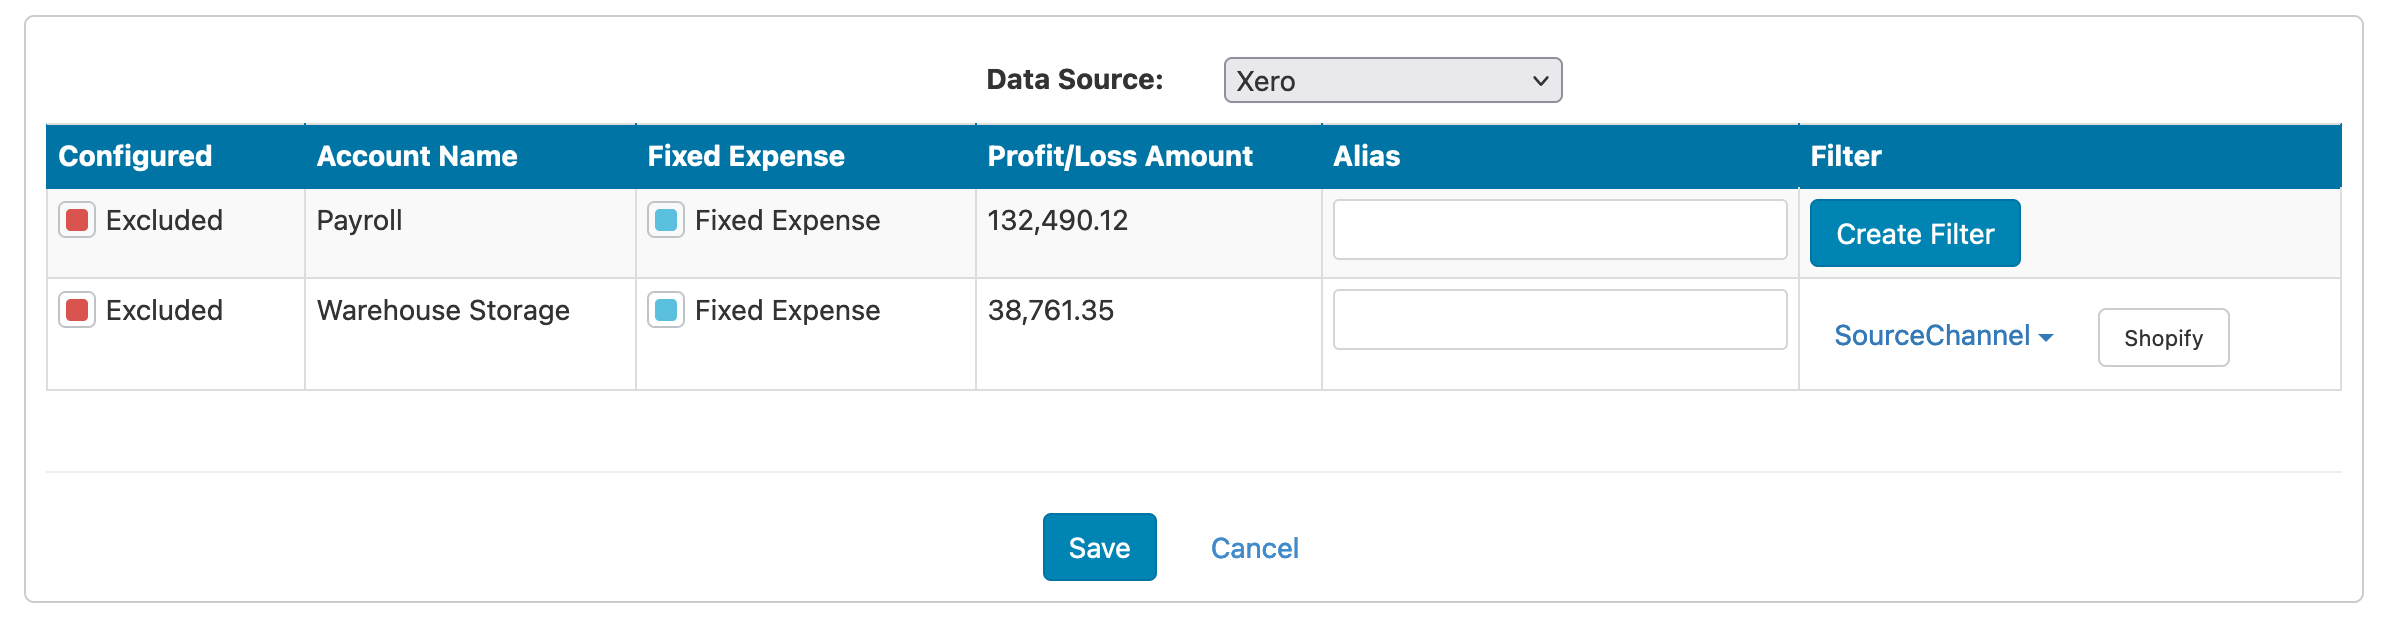
For a given month and account's profit and loss, it needs to be allocated across your orders in some way. When allocating variable expenses from your accounting system to contribution margin, you can choose the field for weighting allocation and optionally add a weight field to apply a further weighting to the calculation. For example, if you have $50,000 in fulfillment costs that you need to allocate across your orders for December, you can choose to allocate that $50,000 per order, weighted by individual order total, or something else altogether. Maybe for your business, it makes sense to weight based on the physical weight of the items in the order. You can choose the allocation field on this page in order to configure how the costs are allocated.
For each account, you can specify an Alias to determine how the cost comes through into the Allocations folder in your data source. For example, you might have five different accounts that all represent Amazon Advertising--you could specify Amazon Advertising as the alias in order to consolidate these for clarity.
You can also mark an account as a Marketing account in order to include it in calculations like Marketing Efficiency Ratio, TACoS and Customer Acquisition Cost. These costs will be represented under the Marketing folder on your data source.
These expenses are then available through the Allocations folder in your data source.
After you make changes to these configurations, you'll want to refresh the data source in order to update the values in Allocations and Marketing.