You may want to compare data across different date fields. For example, a common customer support reporting case is to compare the numbers of tickets created to the number of tickets solved.
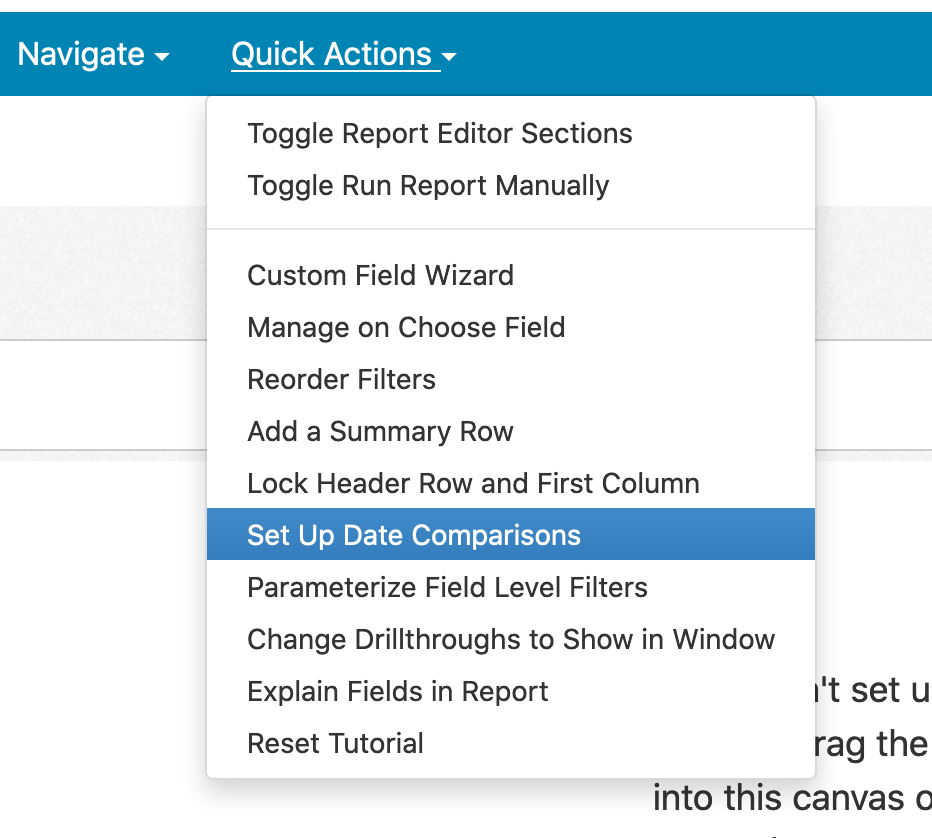
To start with, create a new report in the report editor. Click on Quick Actions -> Set Up Date Comparisons. This action will create a Date Comparison custom field.
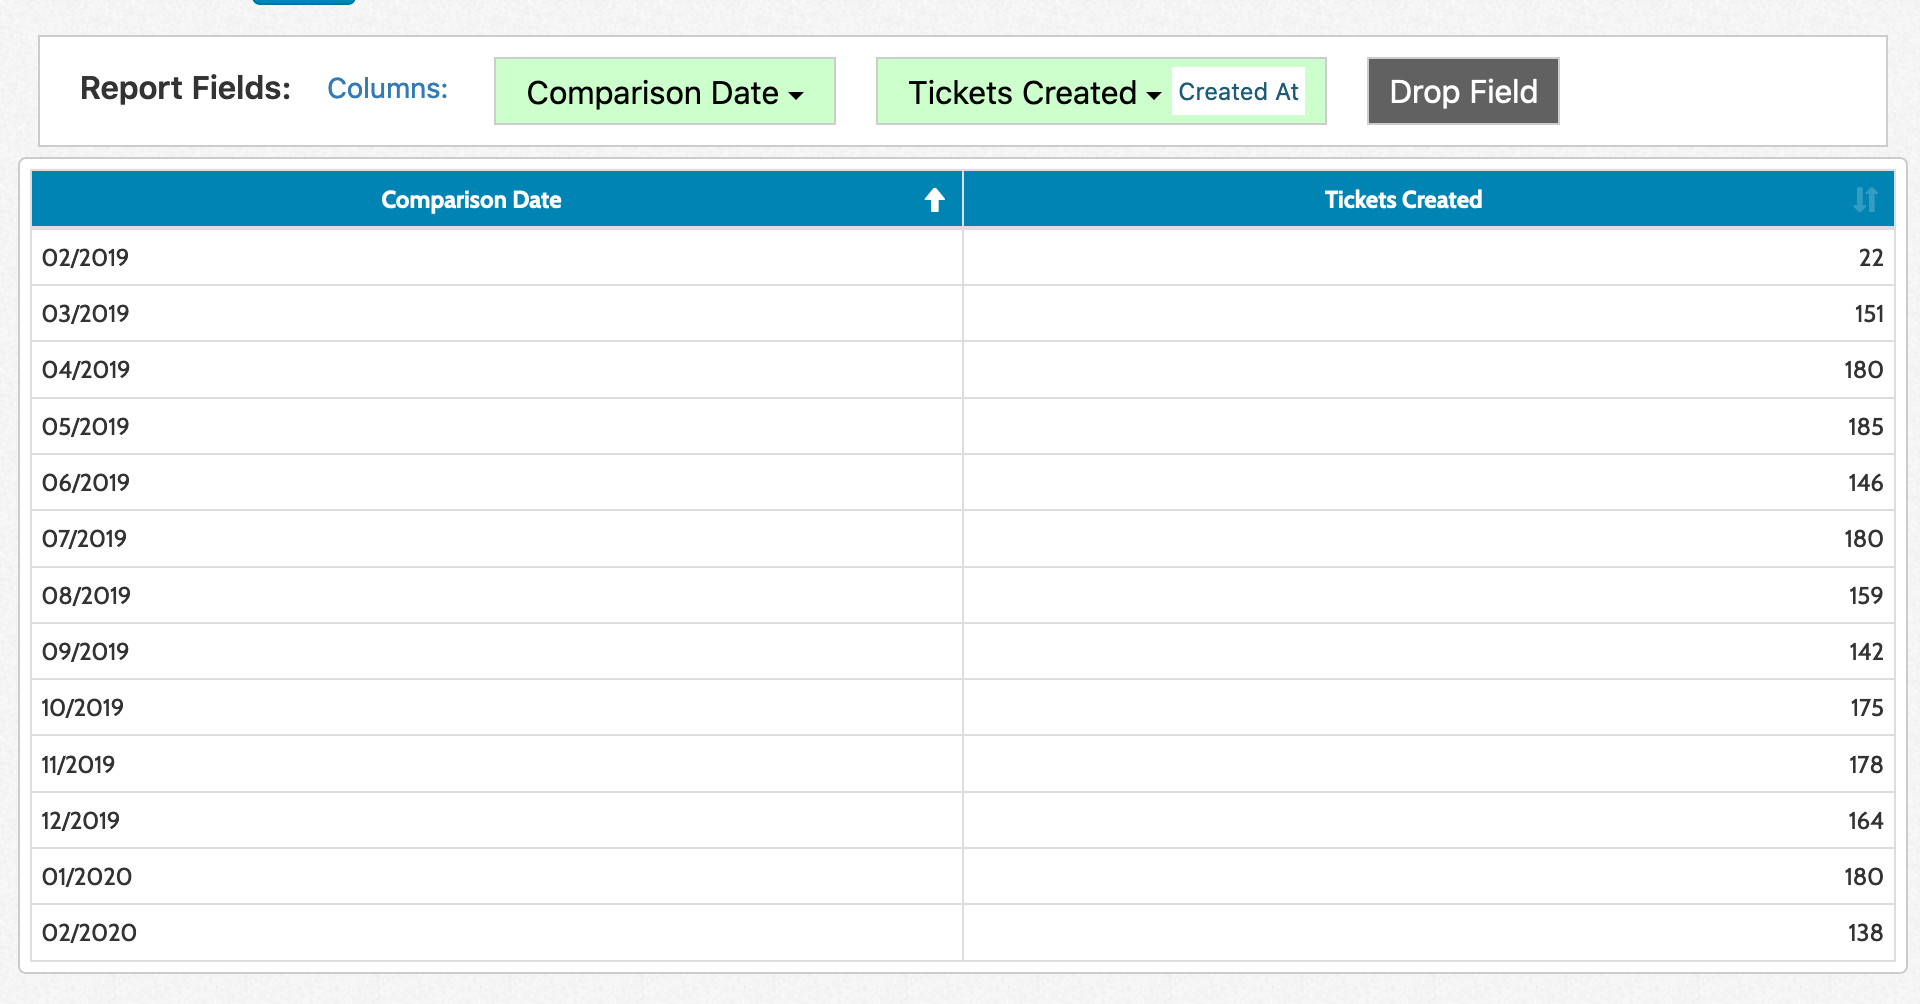
When we first add the Date Comparison field to the report, no results are shown. We have to configure one or more measures to get meaningful results. To start with, we'll go ahead and add Ticket Count to the report.
You'll notice that when you add Ticket Count to the report, there's a 'Select Trend Date' link next to the field. By clicking on this link, you can choose the date field to use for the measure. For example, to track tickets by their creation date, you would choose Ticket Created At. For clarity, you may also want to click on the field edit and rename the field to something like 'Tickets Created'.
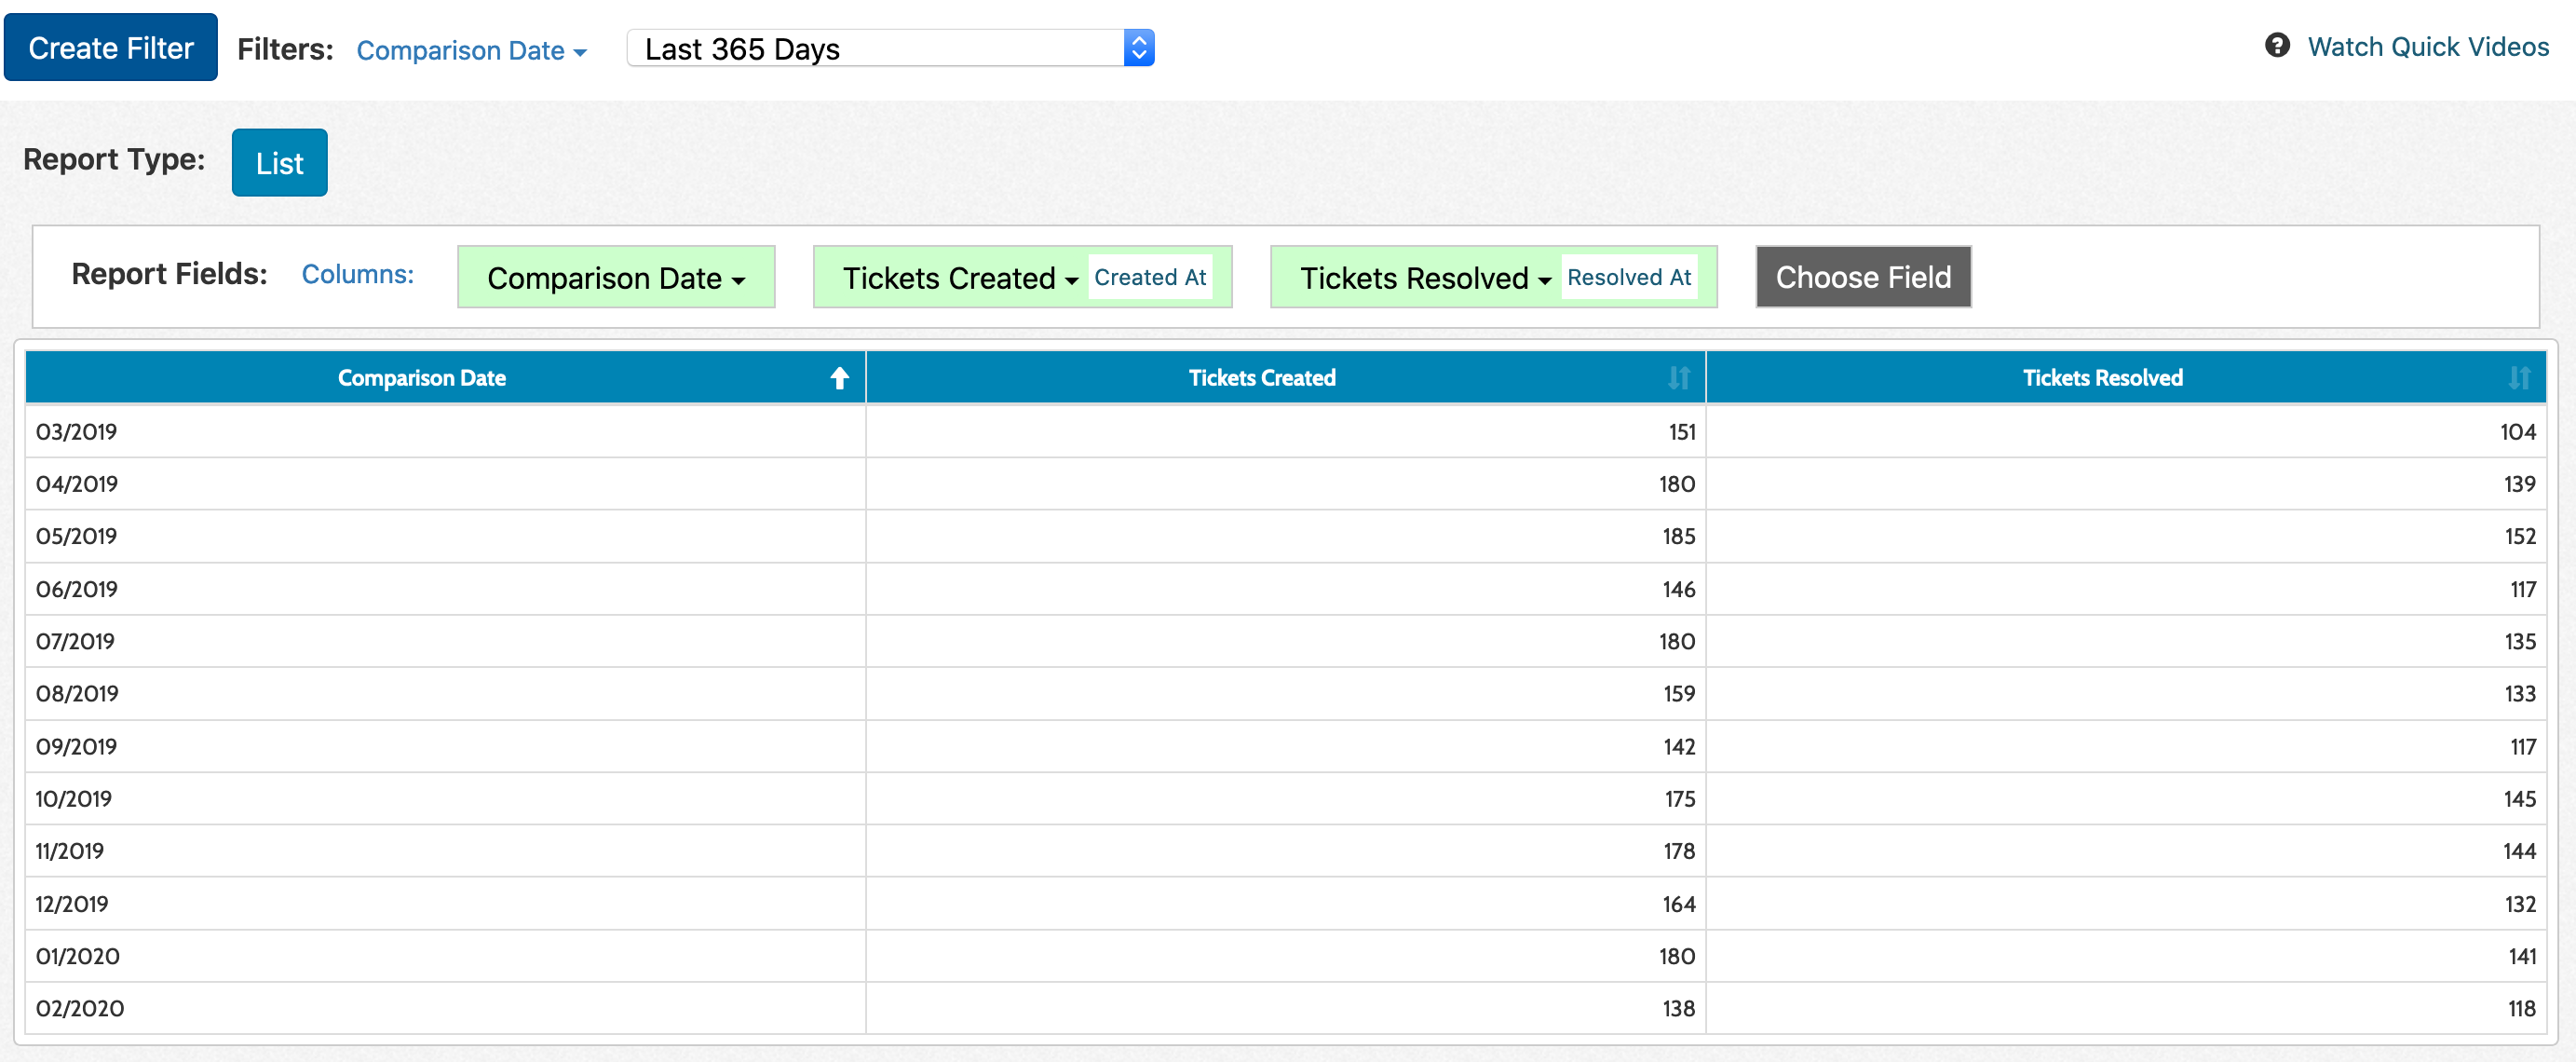
Next, add Ticket Count to the report again. This time, choose 'Resolved At' as the date field and rename the field 'Tickets Resolved'. You'll see that for each month, it shows you the number of tickets created and solved in that month.
In order to filter the different date values, simply create a date filter on Comparison Date as opposed to creating a date filter on Ticket Created At or Resolved At. The filter will automatically apply to the appropriate fields.
For custom measures, you'll want to make sure the different fields feeding into the custom measure are using the correct dates. In case you have trouble figuring out which particular dates are being used by different parts of the calculation, click on Quick Actions -> Explain Fields in Report.
If you look at the date fields shown in the rightmost column, it'll tell you which particular date it's using for that field: