You can extend your data with custom fields. For example, you could add a Project Category to your Projects or match your support users up to customer records in your CRM system.
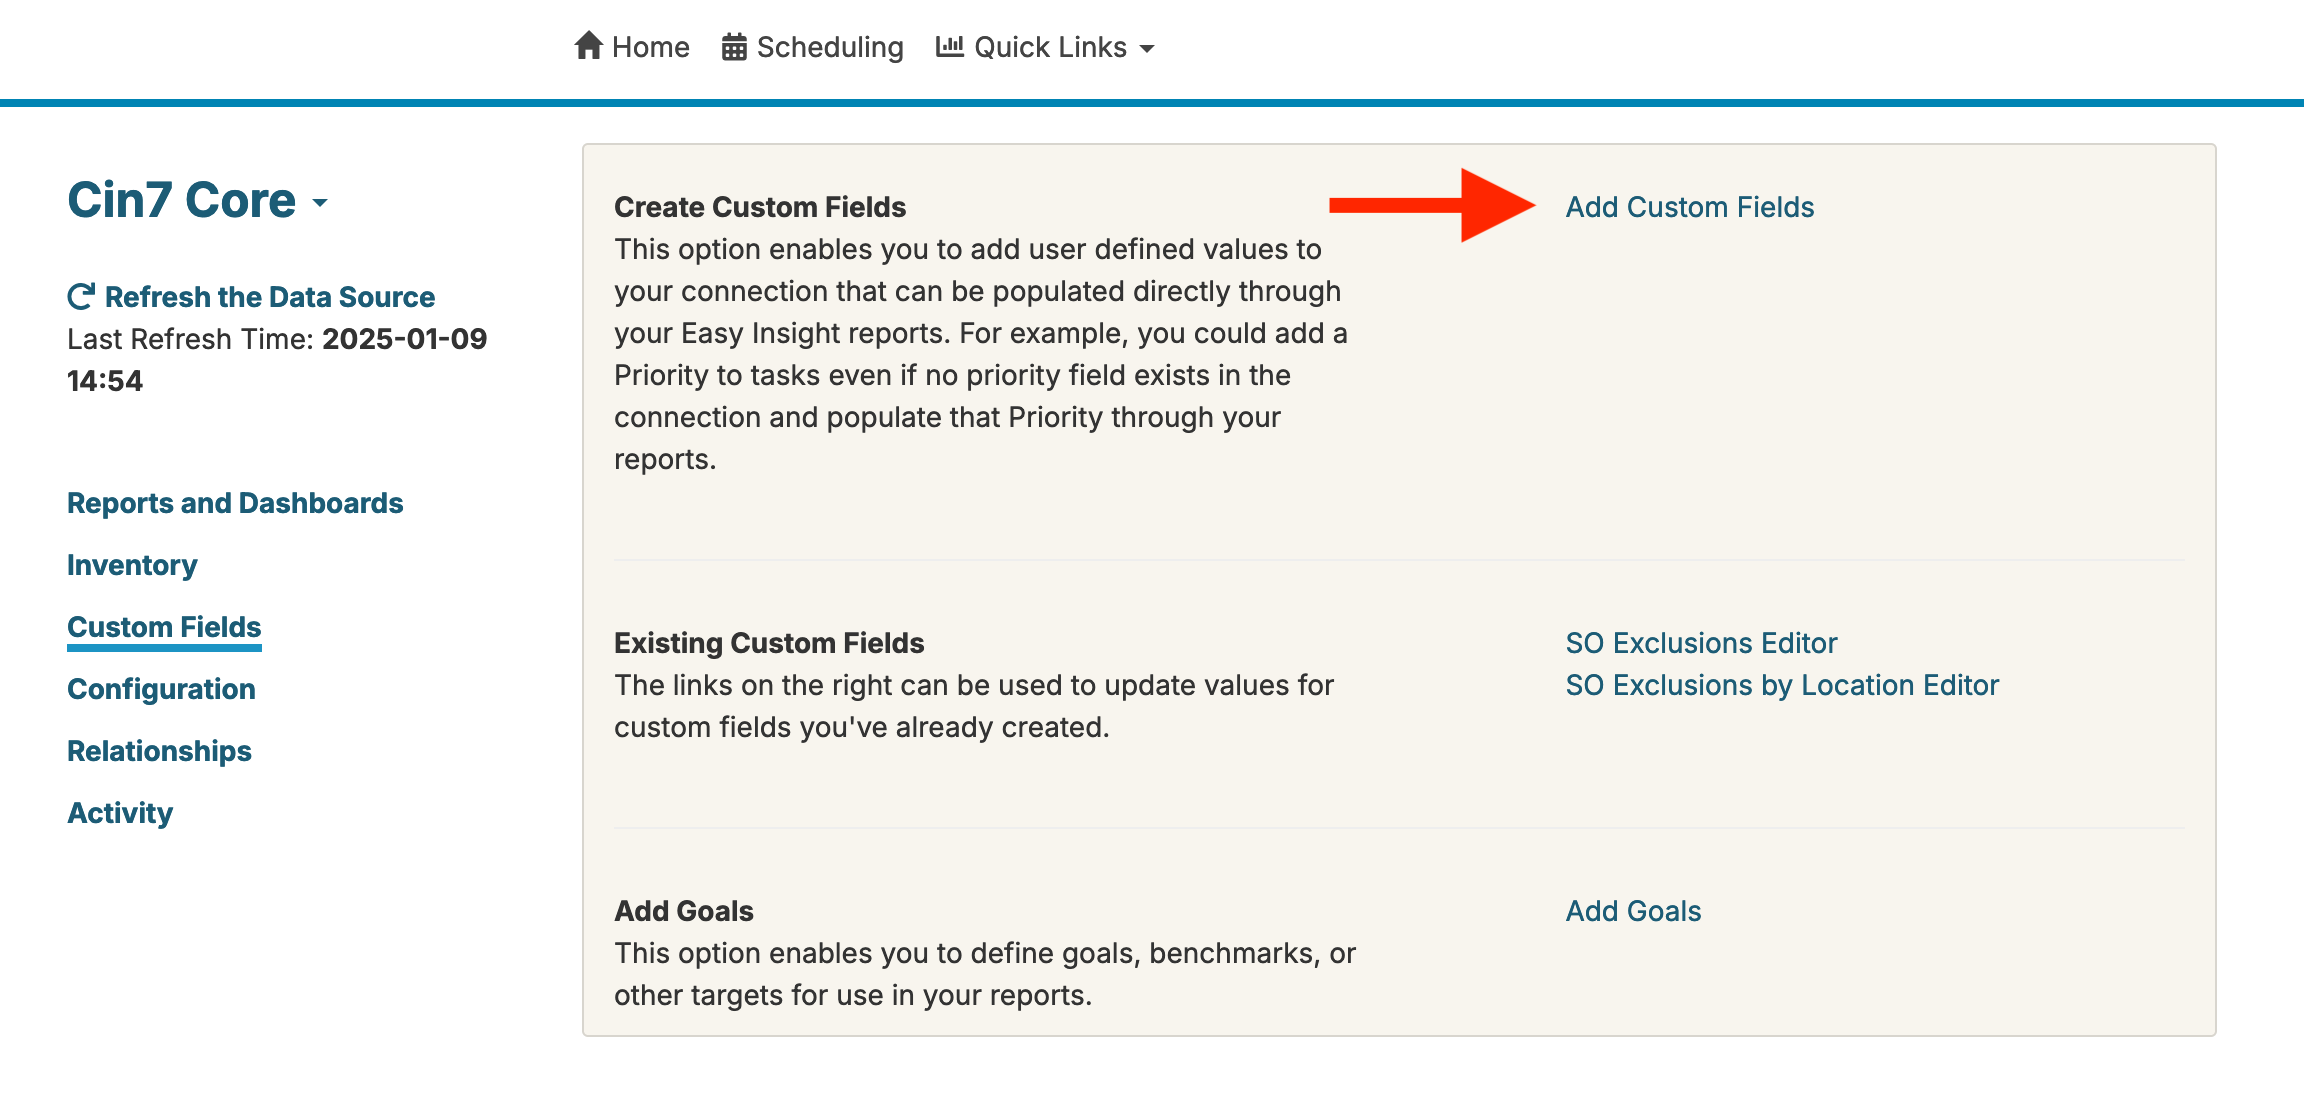
From your data source, you can click on Custom Fields to get started:
Depending on your data source, you may or may not get some suggested fields to start with. For example, Basecamp will suggest custom fields on top of your projects or todos, while Cin7 will suggest adding custom fields to your products and reps:
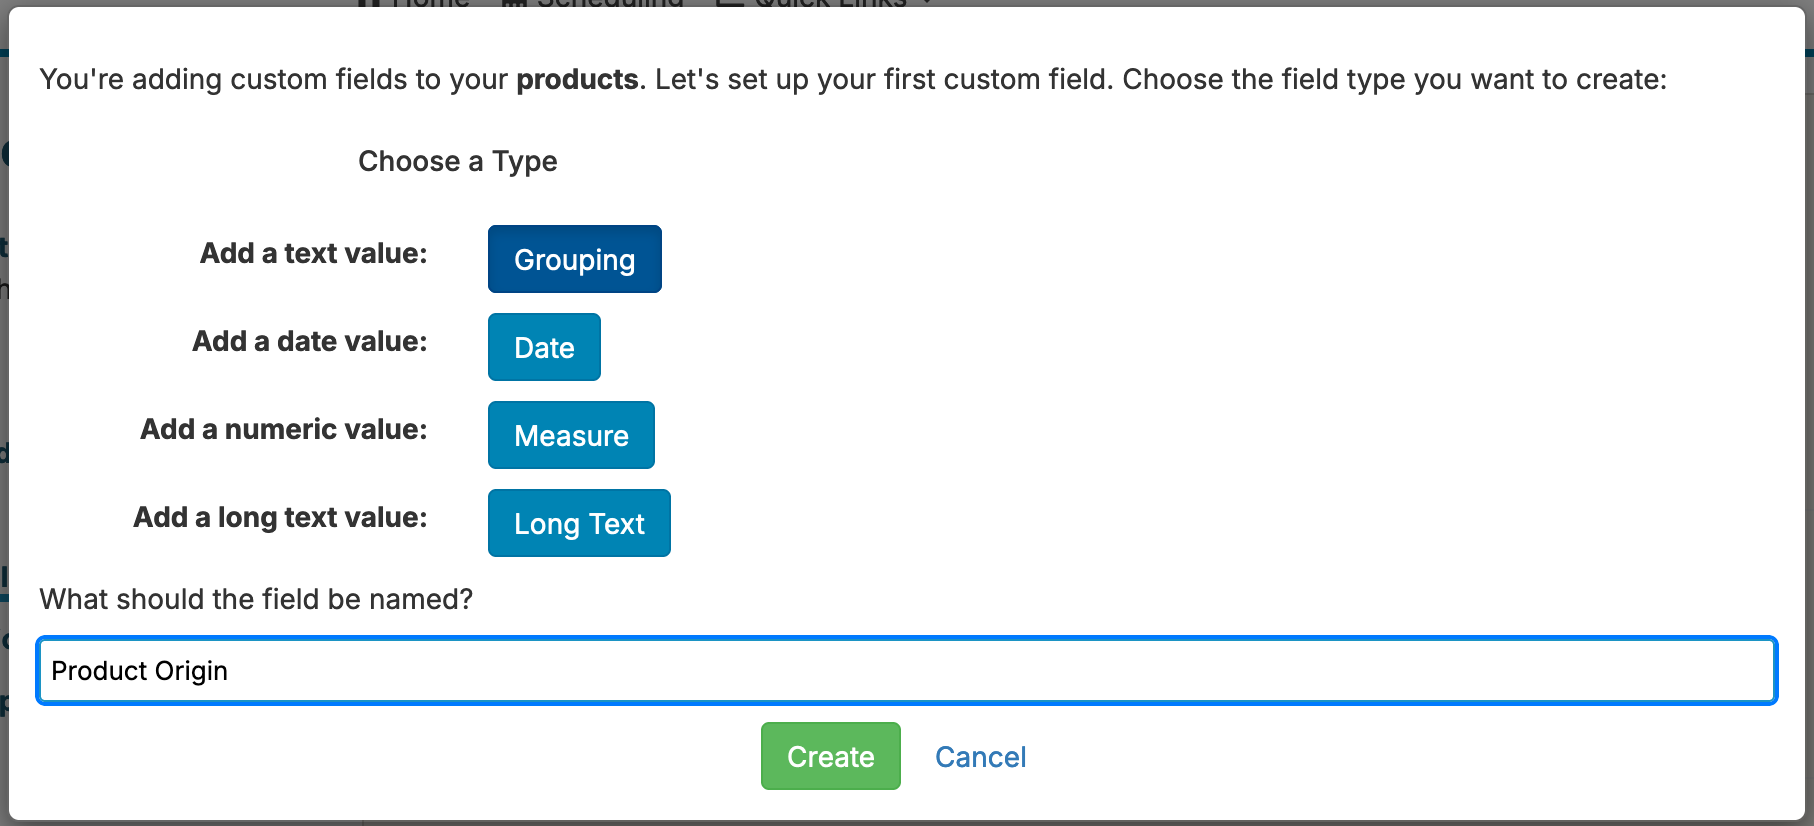
Whether you're creating a suggested custom field or setting up your own, you'll need to choose the type of field you're creating and give it a name:
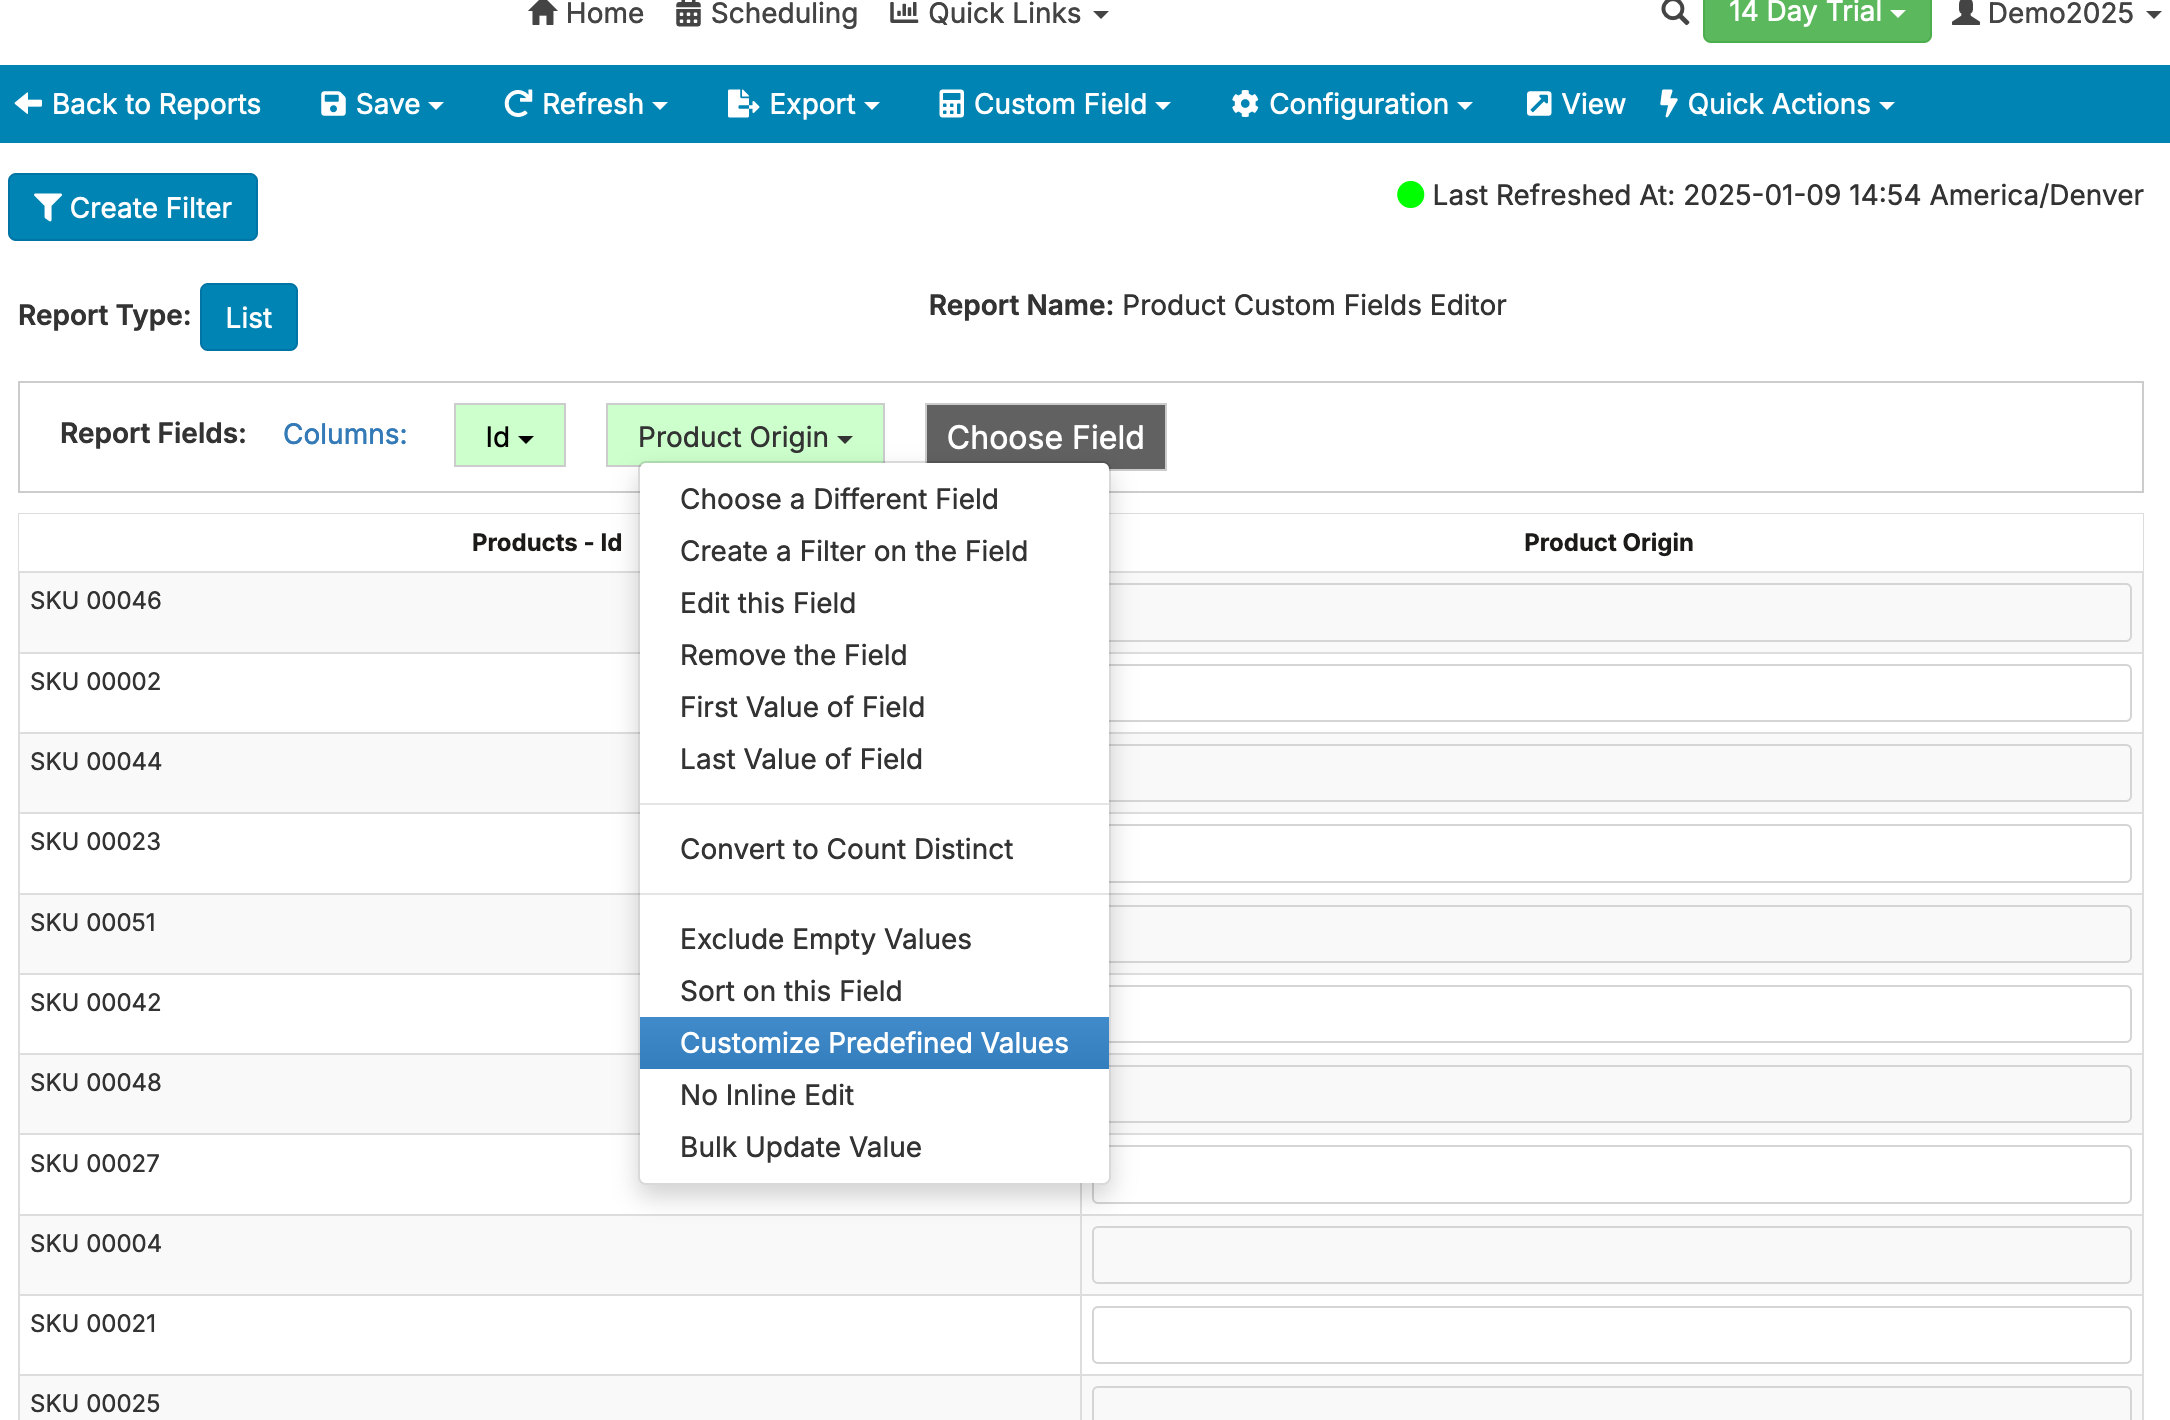
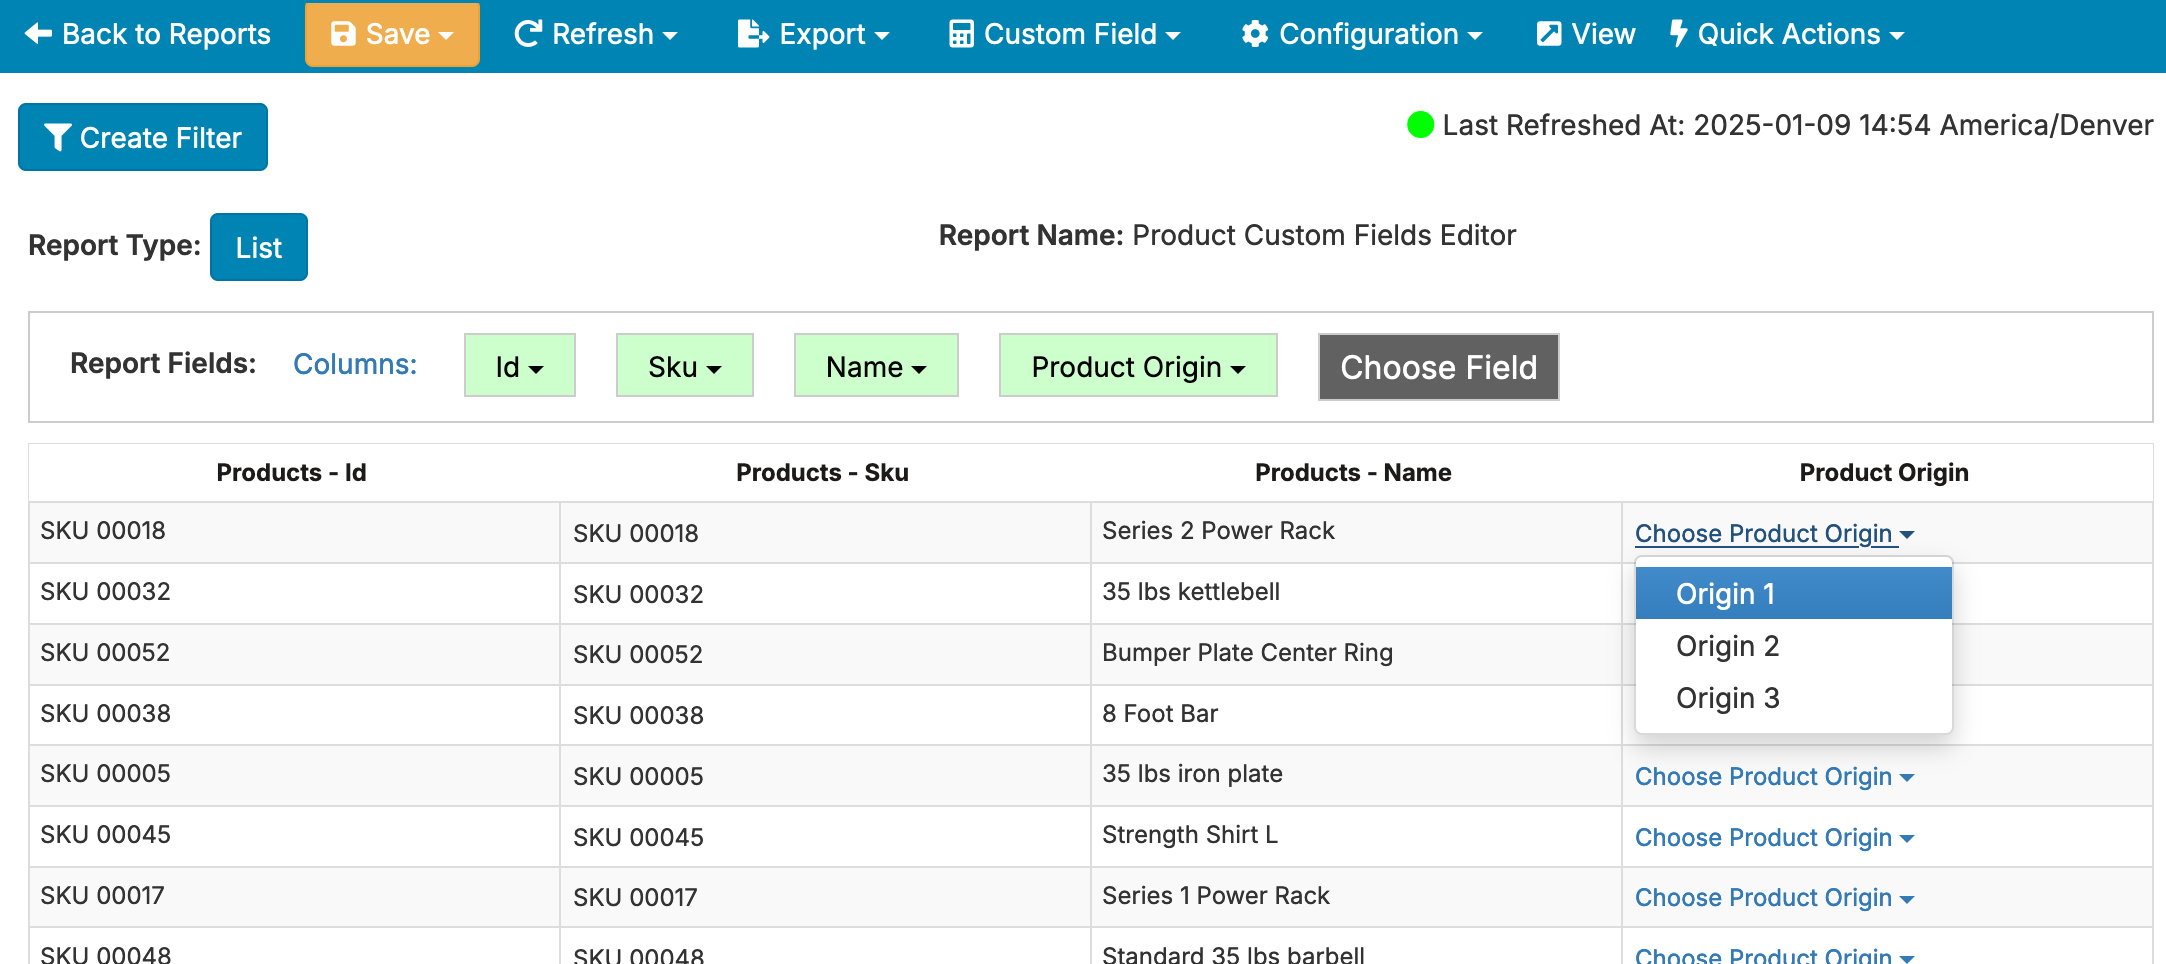
After creating the field, you can assign values through the automatically generated editor report. Simply click on the value you wish to assign or change and start typing, and the value will be set. If you want to specify a set of predefined values for a custom grouping field, click on the report field dropdown and you'll see an option for 'Customize Predefined Values':
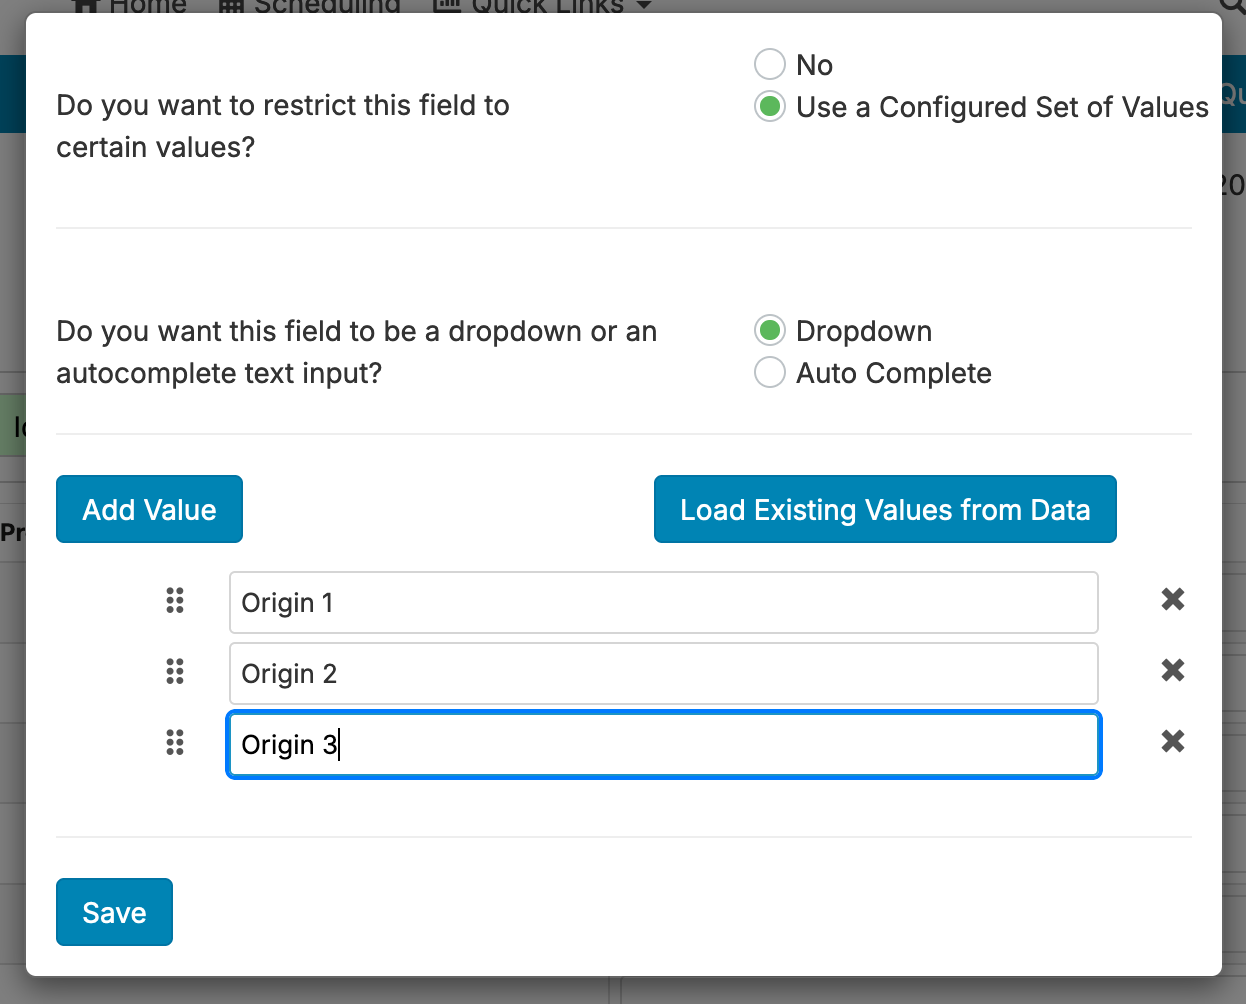
This window allows you to add predefined values to the field, which will then populate as a dropdown in reports instead of as a raw text input:
After customizing predefined values, you'll see your options as a dropdown menu:
After you initially set up custom fields, a two way report is set up for you to edit your custom field values. You can add more fields to this report as necessary--for example, if your custom fields are on Products, you might want to add SKU, name, category, and other fields.
You can use your custom fields in any other report by going to the folder containing those fields and adding them into your report:
If you want to make the field editable from an existing report, change the report type to one of the two way report types found under the report type options:
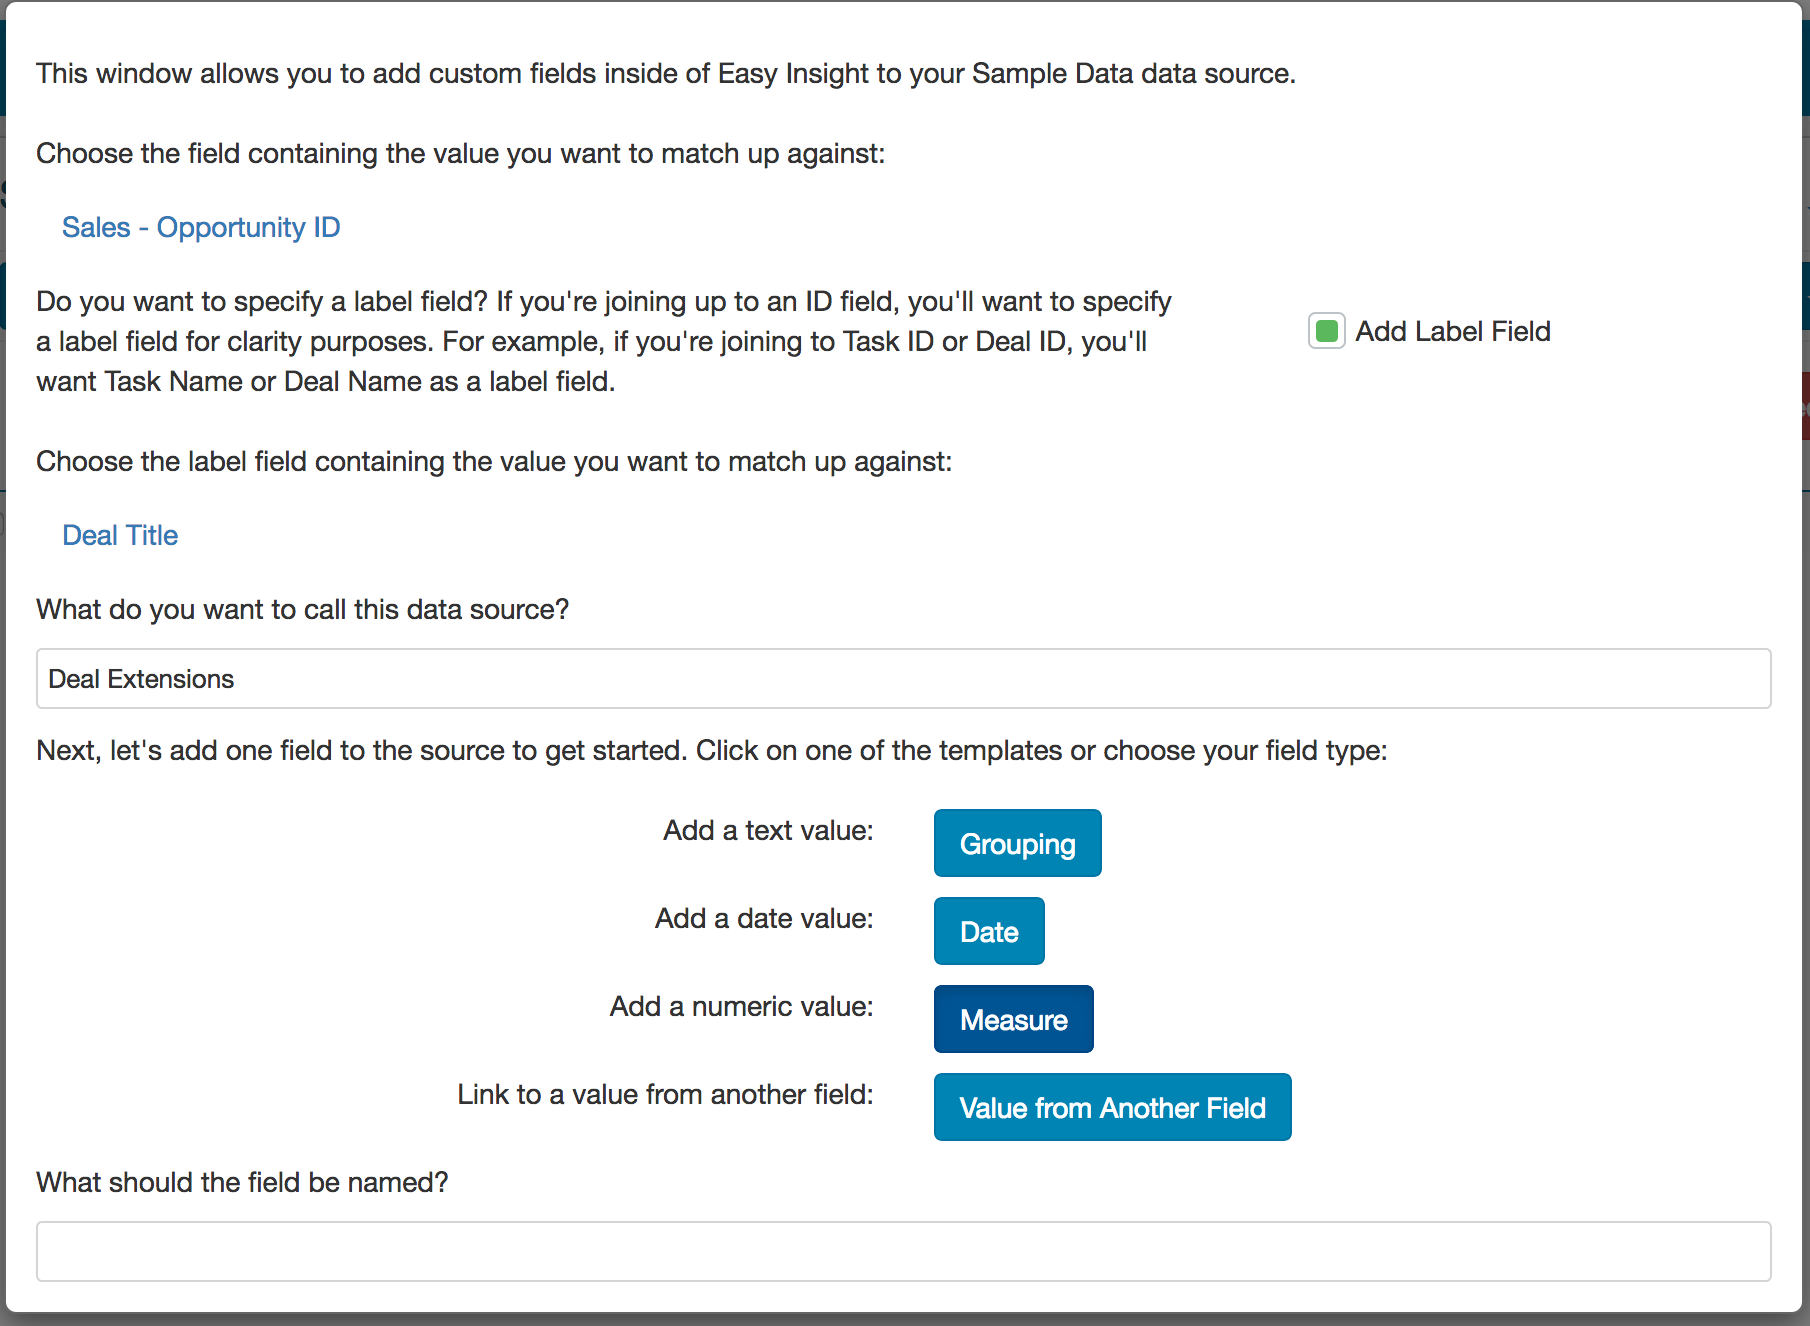
If you don't have the option to use a template on your connection or simply want to create your own custom field, the configuration will be slightly different. First, you'll need to choose the field you wish to base your custom field on--for example, if you're adding custom fields to your Deals, you might choose Deal ID. If you're adding custom fields to your products, you might choose Product Code. In this example, we're doing Opportunity ID:
You can choose whether or not to include a label field as part of the configuration. For our above example, we're using Opportunity ID, but we also want to include Deal Title so that when we're assigning values, we know which deal we're mapping the data into. We'll need to choose a name for the custom field data source, choose a type for the field, and name the field. In the above example, we're labeling the data source as Deal Extensions and choosing a Measure as the type. Once generated, the field is editable in exactly the same way as the Basecamp example.
If you want to add more fields, you can go back to the Custom Fields page on your data source, add custom fields again, and do 'Add More Custom Fields':