1
Choose the report - choose the data source containing your report and choose the report itself
2
Output format - choose the output format for the email from the options of Excel, PDF, PNG, inline HTML, inline PNG, Slack, and Moxtra
3
Next - click on Next to proceed to the next step of configuration
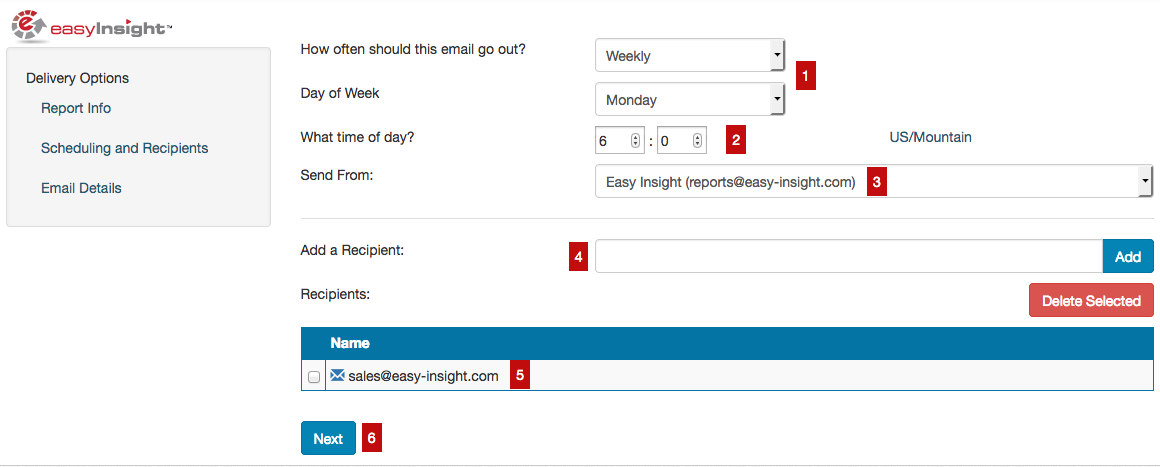
1
Choose the interval - choose the interval for the email from the options of Daily, Weekly, Monthly, Weekdays, Monday/Wednesday/Friday, and Tuesday/Thursday
2
Choose the time - choose the time that the email should go out
3
Choose the sender - you can send emails either from reports@easy-insight.com or your own email. If you do use your own email, you may encounter email spoofing issues, so reports@easy-insight.com may be better to start with
4
Add recipients - you'll need at least one recipient on the email. You can add users from your Easy Insight account, email addresses, or Easy Insight groups to send to everyone in the group
5
Manage recipients - this list shows everyone currently on the email. You can select via the checkbox and click Delete Selected to remove recipients from the email
6
Next - click on Next to proceed to the last configuration step
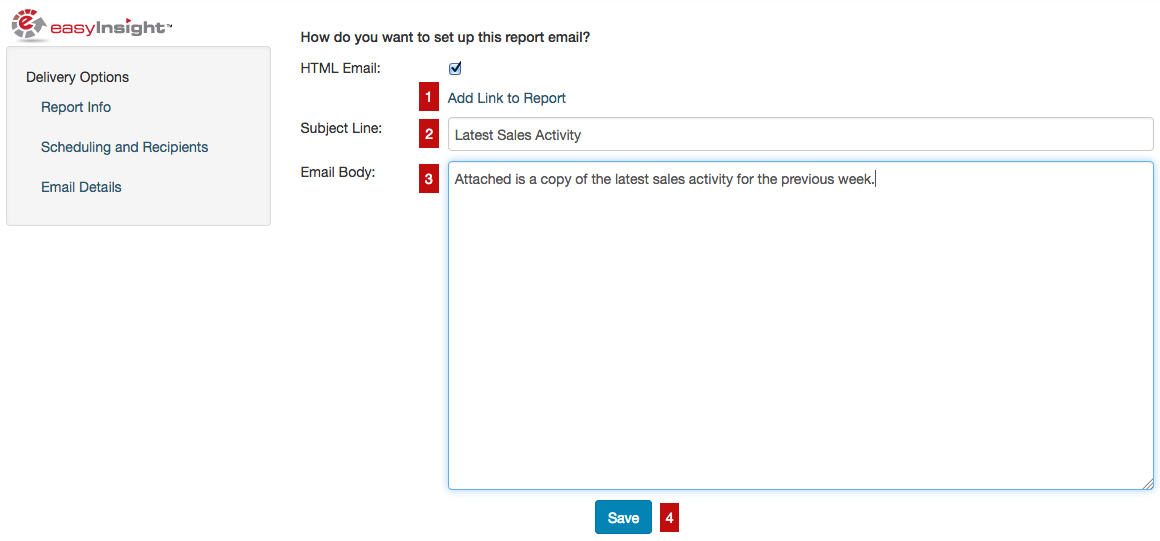
1
Add link to report - click this link to insert a link to the report back in Easy Insight into the email body
2
Subject - enter a subject line for the email
3
Body - add any additional body text you want to appear before the report itself in the email
4
Save - creates and schedules the email!


